This is the third article in a series titled, "Your First Lesson In Vim". These articles are written with a goal of helping out new Vim users by teaching the awesomeness of the Vim editor there by extending the Vim community. Vim though quite powerful, has a bad rep for being hard to learn and hard to get started with. So, even when someone is interested in learning about Vim, that infamous learning curve seem to be scaring them off. Hopefully this series will put those fears to bed.
In the last article How To Exit Vim, we have seen what Vim modes are and what they do. So, If you know about Visual Mode, Insert Mode, Command Mode and Normal Mode, then continue with this article. Otherwise take a look again at the previous article. Vim modes are really important to understand this article and the upcoming ones.
I wanted this to be a part of the previous article but since this is really important and has a lot of potential information to discuss, I decided to give this its own full article. We will be spending most of our time in Normal mode here as that is where we will navigate in the file. You have seen how you navigate in Vim using h j k l. If you haven't figured out already, Vim's main philosophy is increasing your productivity and because of this some of the things Vim does might seem different compared to the usual way you are used to in other editors. Using h j k l is one of those things.
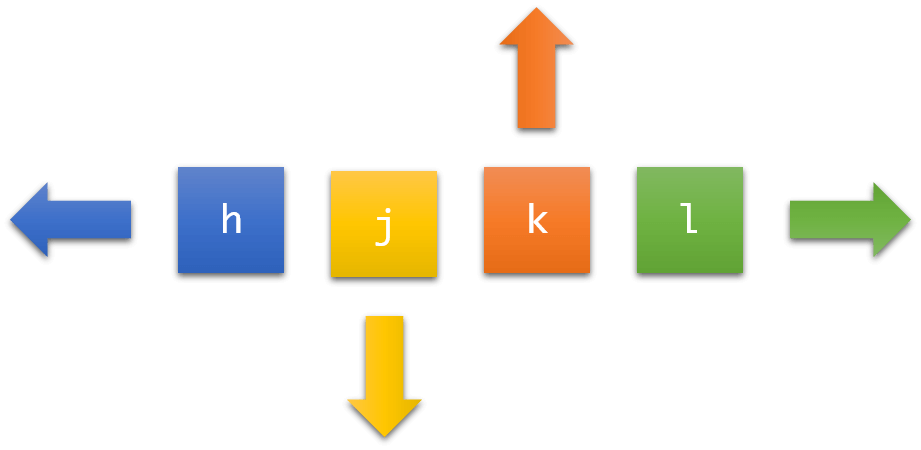
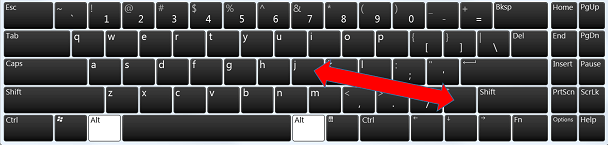
We have covered this in the last article but as promised I will expand about it here. If you look at your keyboard you will see that h j k l are on your Home Row (unless you are using Dvorak Keyboard, in which case this article probably won't help you much). Having the navigation keys on the home row is such an advantage as you don't have to move your fingers at all to access them. Going to the arrow keys for navigating is tiresome and time consuming. Don't think so? Well try it out yourself. Rest your fingers on their normal positions on the Home row (a s d f - j k l ;) and try to hit the UP arrow and come back. Did you see the travel involved in that? Do it again and see how you have moved your hand away from the keys and came back. Do it 5 more times and tell me If i am wrong when I say its just unnecessary travel, Especially since you have the navigation keys right on the home row in Vim. This is one of the reasons why Vim users are usually pretty fast. They don't keep moving their hands on and off the keyboard every time you have to go up or down. And again this could save you from potential RSI injuries.
So, I strongly advise you to stop using UP and DOWN arrow keys. To use the h j k l keys more, try playing Vim Adventures. Its a fun game where you go around the textland collecting characters using Vim's navigation controls. It will help you use the h j k l keys and just after a couple of tries it becomes muscle memory.
One more thing that you won't see Vim users (#VimRocks) using is Mouse. The argument against using Mouse is the same one as that for the arrow keys. You are taking your hands off your main row which not only breaks your typing flow but also is just plain annoying. Its the same for mouse except you're moving your hand even further which makes it that much worse.
Getting rid of Arrow keys and Mouse is not an easy thing. This is cert ainly something that takes time to get used to. But once you do, you will be that much faster in your work flow.
Vim Motions
Vim Motions are the amazing things that make Vim users so fast. You already know about h j k l. Motions are just about anything that moves your cursor from one place to another. Apart from that you also have w W b B e E H M L. Let's see what they do.
Command What it does?
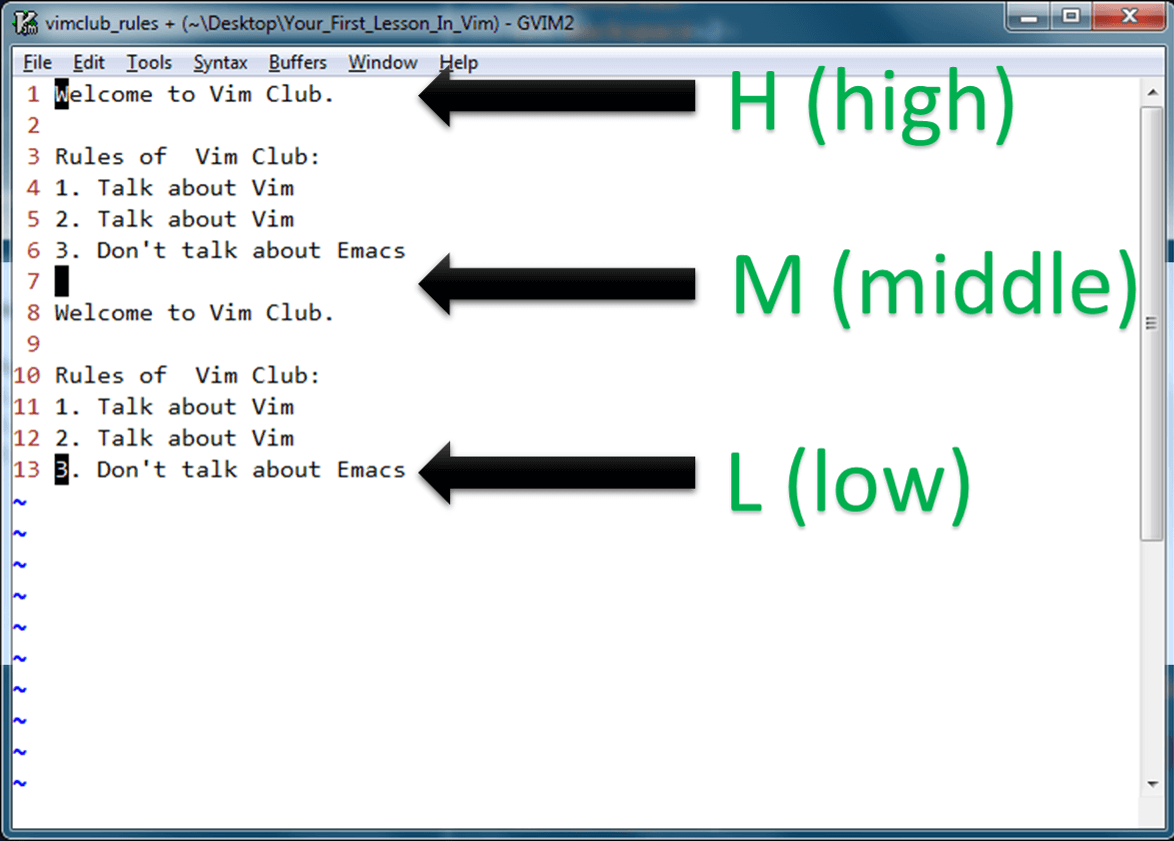
w Move the cursor to the starting of the next word W Move the cursor to the starting of the next WORD b Move the cursor to the starting of the previous word (Mnemonic - back) B Move the cursor to the starting of the previous WORD e Move the cursor to the end of the current word (Mnemonic - end) E Move the cursor to the end of the current WORD H Move the cursor to the First line of the current visible screen (Mnemonic - High) M Move the cursor to the Middle line of the current visible screen (Mnemonic - Middle) L Move the cursor to the Last line of the current visible screen (Mnemonic - Low)
The usage of H M L commands should be clear with this image below. They move your cursor to first, middle and last line of the screen respectively.
To understand about w b e and their upper case variants we have to understand how word and WORD are defined in Vim. From the official documentation (:help word),
A word consists of a sequence of letters, digits and underscores, or a sequence of other non-blank characters, separated with white space (spaces, tabs,
) A WORD consists of a sequence of non-blank characters, separated with white space
In short, a group of characters with out a space between them is a WORD and there can be multiple words in that. With that definition let's take a look at some examples and identify the number of words and the number of WORDS in them.
Word # of words # of WORDS
hello world 2 (hello,world) 2 (hello,world) hello-world 3 (hello,-,world) 1 (hello-world) hello_world 1 (hello_world) 1 (hello_world)
Once you understood the difference between word and WORD, all the motions explained in the first table would be clear. Just to make the foundation firm, try them out yourself. Type something in a file and try to see what each of the w b e W B E H M L commands are doing and how they are moving the cursor. All the motions we have covered in this article are called Word motions (:help word-motions). There are some more Vim motion commands that you need to know to quickly navigate with ease. To keep this article simple, we will end this discussion here and will pickup again in the next article where we will discuss about the other motion commands. So, Keep practicing these motions combined with other commands discussed in How To Exit Vim and you would be really fast already. Fast like a Puma!
Well, That is all for this article folks. Will see you again in the next one. Until then, Keep practicing and Happy Vimming!
For more Vim stuff : Vim
Attributions:
Vim Logo - Vim Replacement Icon http://wolfrosch.com/works/goodies/vim (CC BY-NC-ND 3.0)